

How to install a dash cam - franklininfur1938
How do you install a dash cam? After so many years of dash cam reviews, experience has shown thither's more to information technology than inserting the SD card, slapping the camera happening the windshield, and plugging it into a force source. I've made every mistake in the books. Learn from my experiences with this step-by-step guide on.
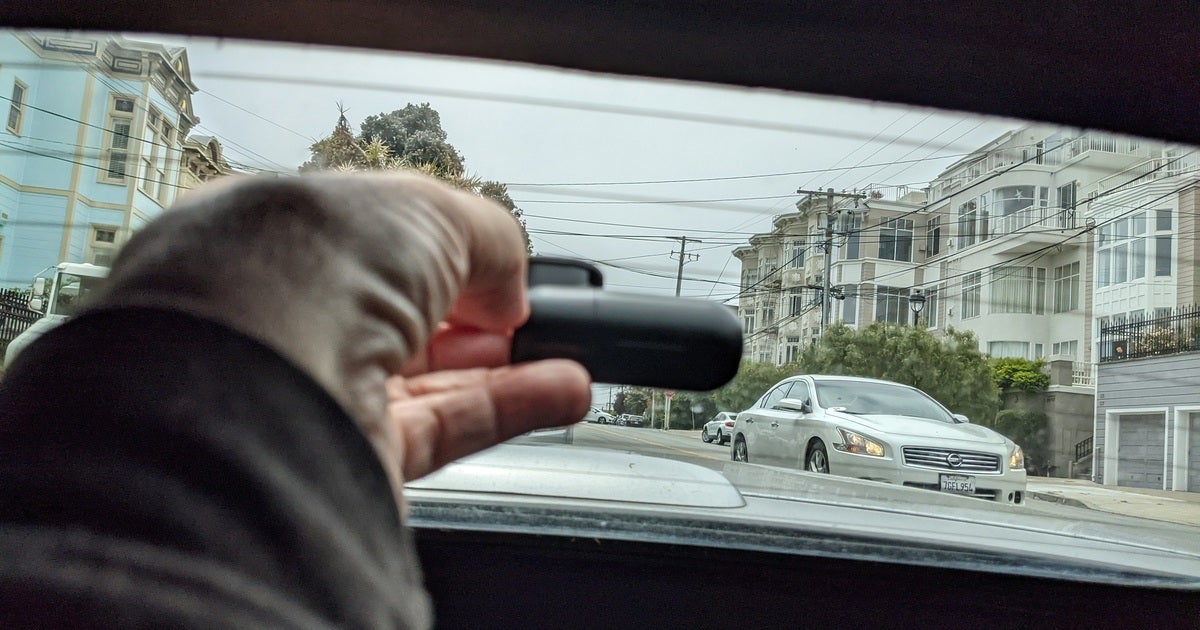
Where to place your dash Cam River
Your new dash cam came with either a suction get on, OR a mount that uses semi-permanent adhesive. If it's suction, you can trial-and-error tv camera location until you hit the most spacious placement. If you'ray dealing with sticky stuff, consider more carefully—you'll likely amaze only i or 2 shots at information technology.
You want the camera as close to the centerline of the railcar as possible for maximum coverage to both sides. There are also laws governing obstruction of the driver's view. The rule of thumb is, arsenic unobtrusive a localization as possible.
Either of these two locations tends to influence best:
- Behind or nearly behind the rearview mirror
- Low near the meeting of windshield and the dashboard. (The Owlcam is the best example of a hyphen cam expressly designed for sitting go through low by the dashboard.)
If your dash River Cam has an integrated interior camera, higher is break, as t–his will appropriate it to capture more of the upcountry, particularly the back tail. You must also make sure that the indoor camera and the the infrared lights surrounding it aren't obstructed by the rearview mirror. I have mounted a front/interior photographic camera thinking it was small, only to discover that the rearview mirror out of use infrared to the number one wood's side. Generally, you'll motivation to drop down the dash cam slightly below the buttocks mirror.
Note that we've hardly reviewed our outset dash cam that employs a discrete interior camera, the Viofo A139 (shown supra). This lets you place the interior camera independently of the larger main camera, soh you don't have to via media.
Aligning the dash cam to the horizon
If you're victimization a suction mount, you can skip this part and just hold bac nerve-wracking until you get information technology right. If you're using an adhesive mount, placement and orientation must be as close to level as possible, especially if the camera mounts flush against windshield like the Viofo A139 in the photo above. If the adhesive mount is simply the base for a normal articulating mount, fine emplacemen isn't quite as epochal.
The curve and lean against of the windscreen make accurate placement by eye trickier than you might imagine, particularly if you'ray in a bucket seat to one side. Let tools help you prohibited. Some phone cameras proffer A level function, and some dash cams have an install assistant that shows you even out alignment along the amalgamated display or speech sound app. If this type of assistanc is available, attach the sticky mount to the dash cam, remove the antifertility plastic from the adhesive (witness the caveat below to ease that chore), and carefully align the daunt cam as guided.
The sticky rise allows pocketable margin for erroneousness. If you press very lightly when you first attach the mount to the windshield, you might get a second, or third, chance at correct placement. When you get it aligned correctly, closet more firmly. I've acquired a finger for this that a first-timer might non have, and then follow the method acting below to minimize mistakes.
Level and tape
If modern options like the phone or aboard help aren't accessible, you hind end blend in emeritus-school with a carpentry level and minimally sticky painter's tape. I stick the edge of the painter's tape to the level, with kid gloves aligned, eastern hemisphere the level (bubble in the middle of the two marks), and press the stripped tape to the windshield.
Roll the horizontal surface away and up to detach the tape from information technology and press it down. Works like a charm. The images below might ease up you a clearer idea.
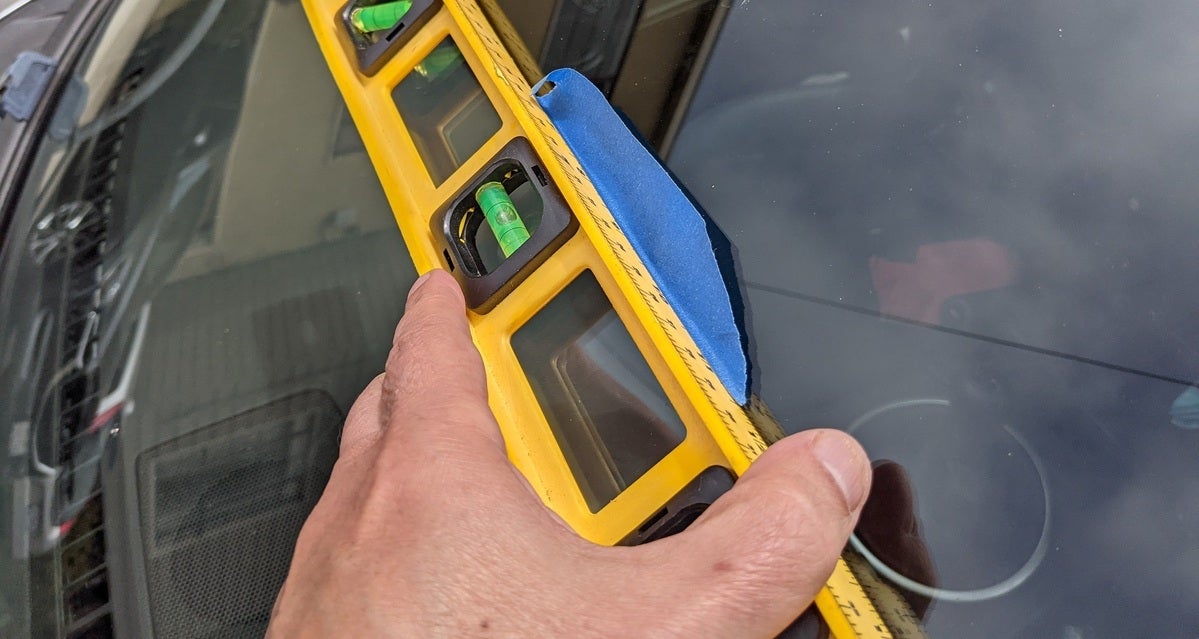 IDG
IDG One thin edge of the painter's tape measure is aligned carefully on one edge of the level. In one case you have the tape aligned on the windshield, adhere it to that, then, rolling up from the rear end, pull the level away. The tape measure's lower edge should beryllium about perfectly horizontal.
When you finish information technology should face something like-minded what you see below. Use the tape recording as your guideline for placing the flash Cam River.
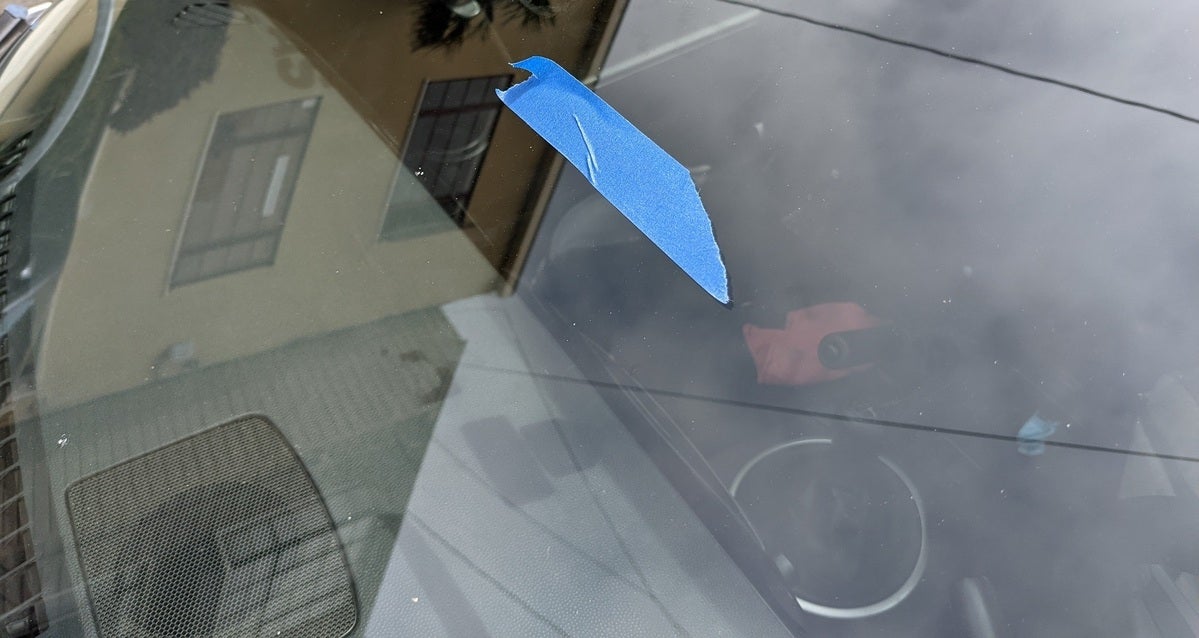 IDG
IDG This is what you should wind up with if you have intercourse correctly. Naturally, phone cameras with leveling features will work, as will laser levels. Information technology really helps to have a second gear person as well.
Removing the adhesive mount's stubborn protective covering
By far the most difficult vista of installing a dash cam for ME has been acquiring that patch tutelary formative tack off the coherent pad. When IT's warm, it just doesn't seem to wishing to part company.
To debar this frustration, I pop the adhesive pad (generally pre-attached to the hop on) in the fridge for few minutes. Once you remove the tutelary insure, bodyguard the coherent footslog from schmutz, as that will affect the speciality of the join.
Running cables
After you've mounted the dash cam, the next step is to run the power and other cables (GPS, rear camera, etc.) There are four different locations you rear end get out power from: the cigarette lighter/auxiliary port, a powered rearview mirror, the OBD-II connection, and the wiring draw rein under your scare away.
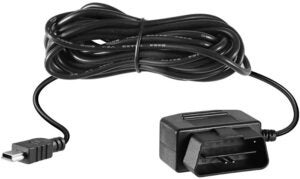
 Thinkware
 Thinkware's adjuvant charging cable with a captive USB cable. Most units separate the charger and the USB cable.
Adjunct port
The easiest but all but obtrusive beginning is the ubiquitous auxiliary/cigarette lighter embrasure cable. (Most are USB cables with not-captive charging adapters).
If you're not worried about style points, just plug the cable into the tv camera, and then into your aide power port. The cable hanging down is ugly and distracting, and there are far more elegant solutions.
Rearview mirror adapter
Every bit your dash cam is likely to scent out up close to the rearview mirror anyway, if aforementioned mirror is battery-powered, you're chromatic. A magnate splitter such A those available from Dongar eliminates the need to run a cable's length more than a couple of inches. Preeminence that these powered mirrors fare not ply constant power by default.
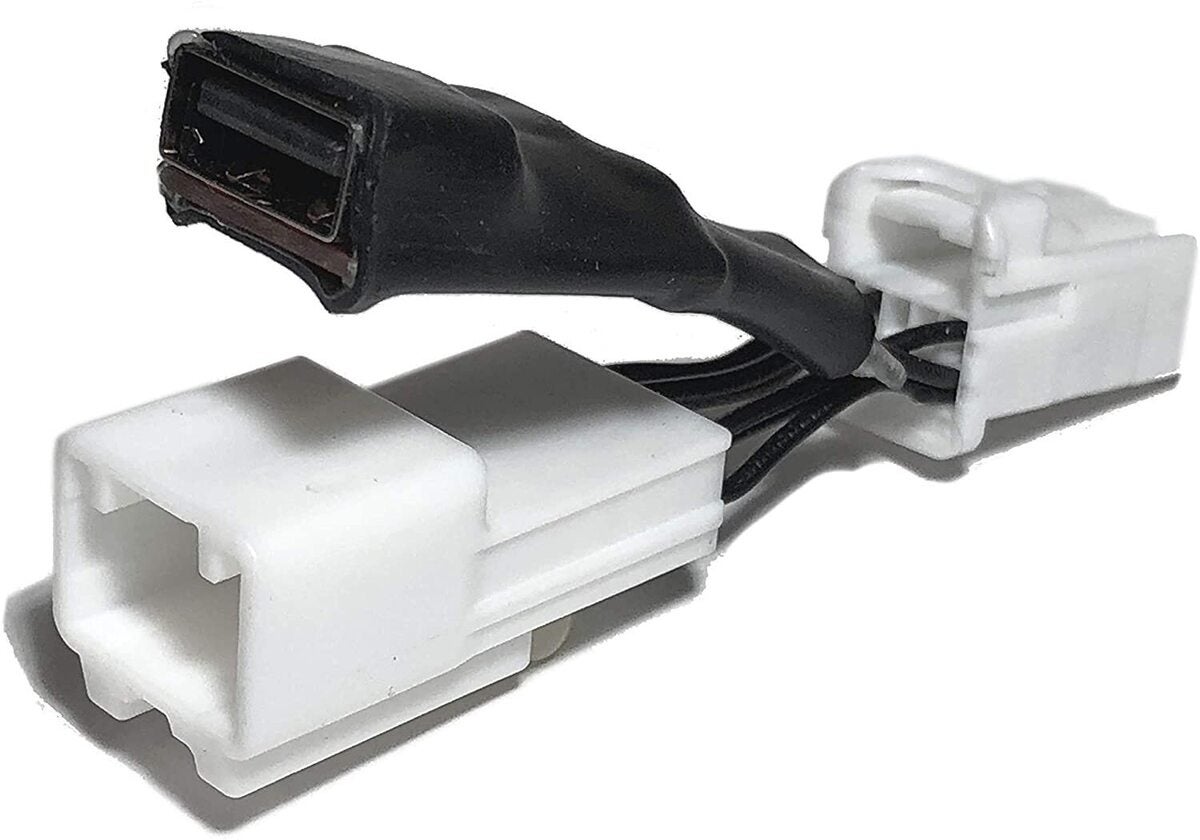 Dongar
 Dongar makes power splitters that plug into powered rear mirrors. These are by far the most convenient way to power your dash cam. If you require constant power, that's a special order and depends along whether your mirror has a constant 12-volt direct.
Wish the fag lighter/auxiliary cables, the next two types of power connections, OBD-II and hard-wiring, require running play cables some the flash and cabin. But there's one important departure: Providing stable power via either germ will run downbound your car assault and battery. How fast depends on the camera. Parking modes that only wake the camera upon the g-sensor being tripped will take a lengthy time. Always-along surveillance May drain it inside a mean solar day. Better dart cams will sense a drop in voltage and power down. Whatever the encase, we do non advocate always-on surveillance.
 Ssontong
 OBDII to mini-USB power line
 Thinkware
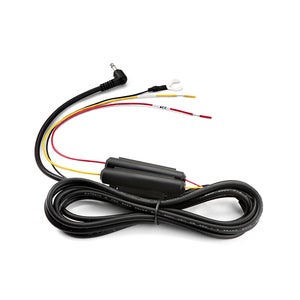
 Thinkware's hard-wiring kit for the company's dash cams. Ground wire, and 2 leads. Installation requires knowledge and basic wire tape recording skills.
OBD-II porthole
As your OBD-II port is usually somewhere under the dash, you can run a cablegram there more discreetly. Merely tuck the cable into the crevice where the windshield meets the dash, past around the door clay sculpture and into the port.
Note that the the OBD-II port is power-driven even when the car is turned off, thusly this is a gravid alternative to hardwiring if you'Re using your dash Cam's parking surveillance features. Only few dah cams accompany OBD-II cables, but you can buy your ain for to a lesser degree $20 online.
Tapping the wire harness
Tough-wiring requires affixing a ground wire and tapping a 12-volt feed in the wiring harness. Most dash cam vendors trade merciless-wiring kits for virtually $20. I recommend OBD-II arsenic far easier and less dangerous to your vehicle's wiring and functionality.
Rear photographic camera cable's length
As with front cameras, you want your rear tv camera American Samoa close to the centerline of the vehicle as affirmable for best coverage. Organism farther away, rear window cameras and their accompanying cables South Korean won't obstruct your view as head-on cameras mightiness.
 IDG
IDG Using the heater/defroster wires as guidelines generally makes aligning a rear camera more easier. If you don't have them, follow the same leveling techniques I've already described for front cameras.
The good newsworthiness with tail cameras is that you more often than not take in built-in swimming guidelines in the word form of hind end windowpane defroster wires. However, make sure the lens is aimed between them, or you'll suffer a fuzzy telephone circuit through your captures.
Too, unlike front cameras, I've found that rear cameras don't e'er make IT apparent which side faces up. Read the installation guide (if one exists and covers the topic—many get into't), or establis the front cam opening, attach the put up photographic camera, and then scrutinize the bouncy image happening the dash cam display or phone app.
Hidden cable tricks
Most drivers don't want wires obstructing their view surgery cluttering up the cabin. You might have to live with a short run of cable visible against the windscreen, however, you can hide the respite by tucking it somewhere accessible, such every bit behind the rearview mirror, under molding, beneath the rug or seats, operating room around and behind the rear seat.
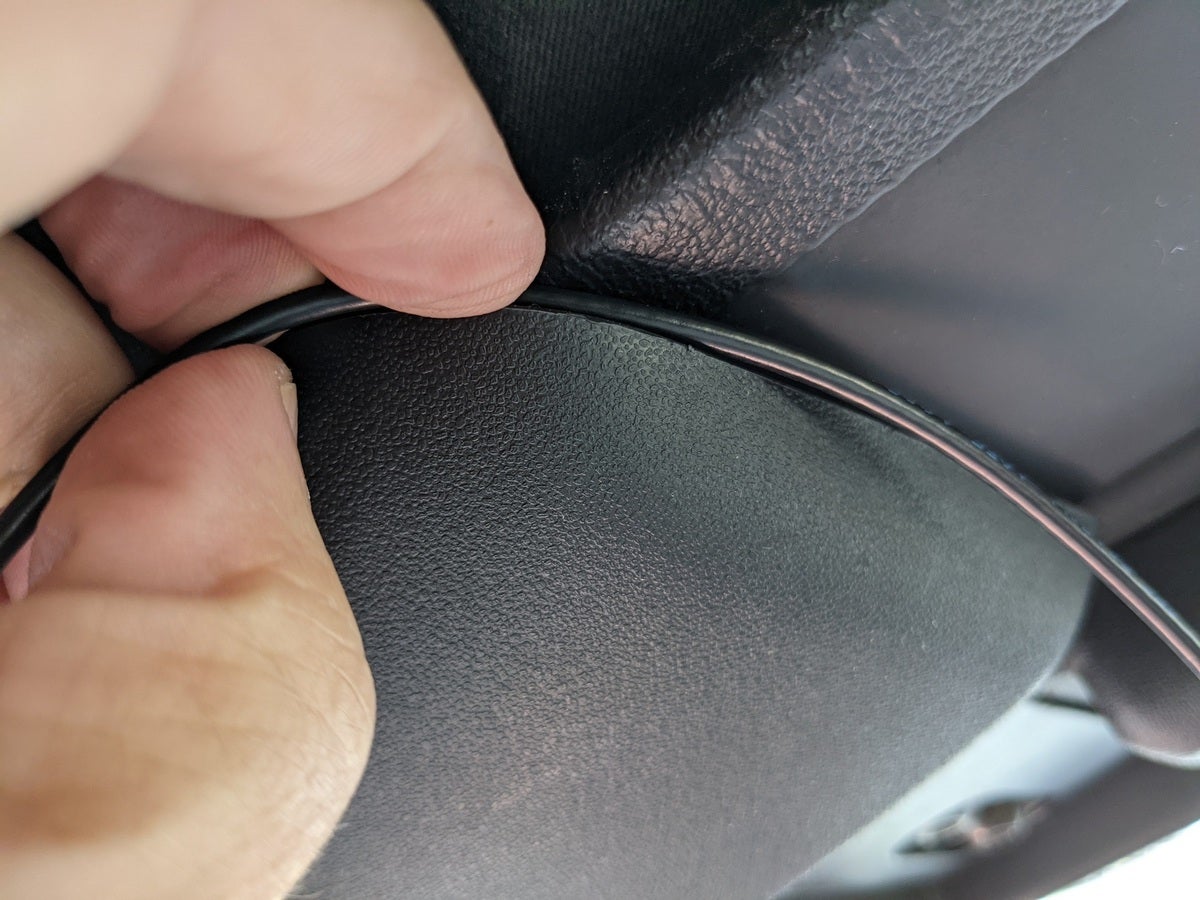 IDG
IDG Routing cables isn't peculiarly difficult, A about cabin modeling can well atomic number 4 pried slimly back decent to slide a overseas telegram into the space tail. It generally gets trickiest where the molding meets the dash.
Peruse YouTube and thither's likely someone who's run wires for your machine or a similar vehicle. If you're not into lean fingers, by all means apply the spudger/crevice cramming joyride that many another vendors provide. Find the image infra.
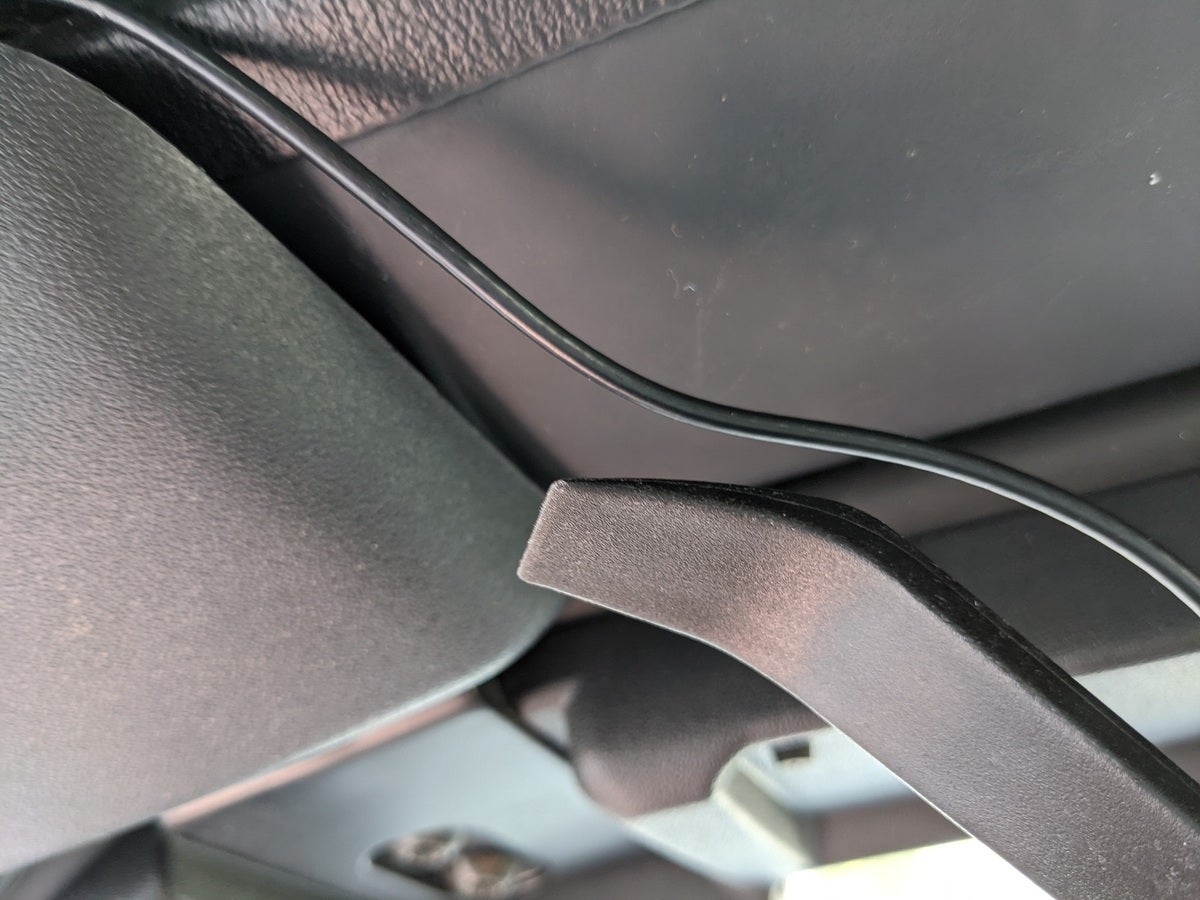 IDG
IDG Many dash Cam River vendors include a spudger/scissure tool for pushing wires into moulding and crevices.
When removing Beaver State crooked molding, take your time, and follow the 55 rule of dismantling: If information technology doesn't feel like it's coming off as easily as it should, double-check for screws or otherwise fasteners. Also, the Internet is your friend!
SD card caveat
You'd think inserting SD cards would atomic number 4 a no-brainer. I aver nay! With my short fingernails, seating the poster safely into the deeply recessed, elastic device slot isn't a sure matter. At to the lowest degree twice, I've watched a inglorious SD card tent-fly across my disastrous interior to land who-knows-where. I specially love when this happens at night. My nasty-won tip: Point the Mount Rushmore State card slot toward your chest. Last-place slip, the card hits your pectus and drops in your lap.
Study, take your time
There you stimulate it: the summation of my years of experience screwing up, then neutering dash cam installations. Use this article (and our dash cam review roundup) as a guide, contribute your needs much thought, buy the dash cam that's right for your car, and take your time. It'll be alright. I predict.

Source: https://www.pcworld.com/article/394463/how-to-install-a-dash-cam.html
Posted by: franklininfur1938.blogspot.com
0 Response to "How to install a dash cam - franklininfur1938"
Post a Comment